designing your own iPhone case
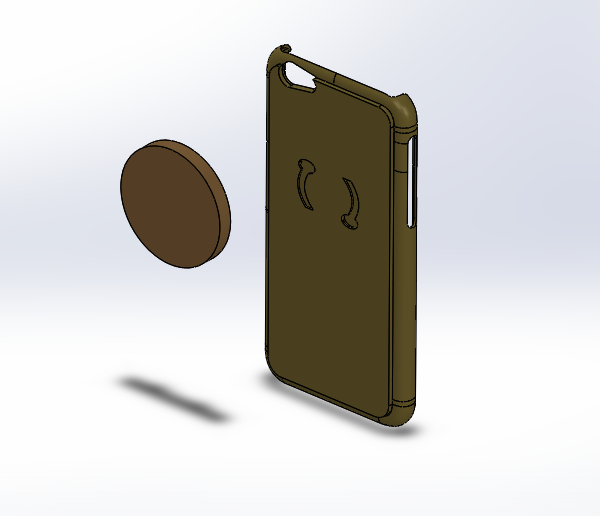
Our product is a customizable iPhone Case with detachable accessories for a niche market of 3D printing and iPhone enthusiasts.
With a standardized port design on the back of the phone, users can design and print (or work with us to CAD and print) their own attachments.
In line with our original goals, we do want to ensure that our final product does have success in both being usable, attractive, and protective for the phone.
Initial Concept Sketches for Ports and Attachments
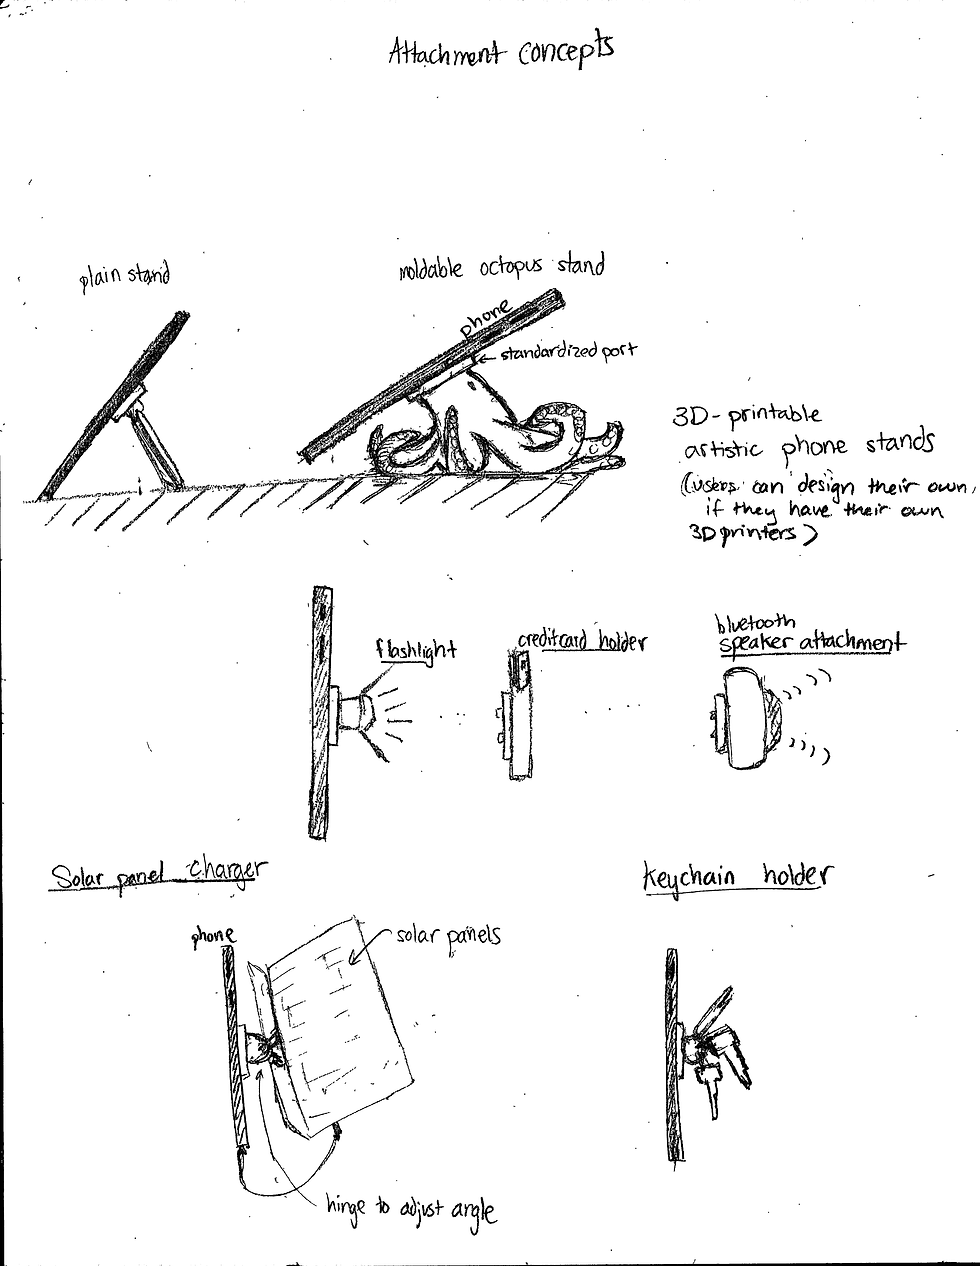


Choice of Standardized Port Design (See concept drawings in gallery above)
We came up with four different concepts for universal docket design.
1. Dongle is to be inserted 45 degrees and twisted until final click. This design is robust and capable of holding the docket still. However it may be difficult to orientate.
2. Dongle is to be inserted and slid in on the same plane. Connectors are 3 extrusions on the same line. The connectors slide into the final position. This design is durable and easy to use but may cause unnecessary slippage due to the ease of the attachment falling out.
3. Dongle is to be snapped on. This dongle is difficult to use and not very durable due to extreme stress. However once inserted, there is little chance of the attachment to fall out.
4. Dongle is to be screwed on. This is the easiest to use and the sturdiest. However, in order to have a sturdy screw, the case must be thicker than the other designs.
Ultimately we chose design number 1 because it lasts the longest while maintaining sturdiness. Although the learning curve may be higher, it keeps the thin structure of the case as well as the attachments sturdy through regular use.
CAD Gallery


CAD File Links
Final Model Prototypes

This case fits an iPhone 6 and the dongle slides in both smoothly and stays put in an intuitive and secure way.

This is one of the many possible accessories, a kickstand, attached to our case.

Users can attach this to their phone case to use their phones while tilted.
This case fits an iPhone 6 and the dongle slides in both smoothly and stays put in an intuitive and secure way.
Assessment of Prototypes (See Gallery Above)
We found the Objet260 printer, in comparison to the Carbon3D and Type A printers, to have the best result in our print. We used a combination of tar and white resin to create the rigid grey print seen in the print. The Objet260 attachment slid smoothly into the port and stayed securely. People who tried it at the Jacobs showcase also commented on how easy and intuitive it was to use.
The drawback to the Objet260 print was the lack of strength. We had planned our CAD originally believing it would be made of a flexible elastomer as suggested by our materials indices. Thus, the wall thickness of the print was quite thin, and snapped easily. When, we put a phone into the case, although it fit, we saw some cracks on the side. We believe that increasing the wall thickness or using a different combination of resins to get a more flexible case material can help solve that problem.
The Carbon3D print failed due to buildup of air bubbles under the sidewalls of the print. Despite the material having a good flexibility, we don't think this printing method is feasible, or we would need to made adjustments to the CAD model to allow for a successful print.
The Type A print was rigid and robust. However, the surface finish and quality was poor. The attachment was able to fit into the port, but was not able to turn smoothly. A solution could be allowing for more loose fit of the attachment into the port.
Some attachment designs we modeled included some 3D printed stands on the Type A and Dimension machines. We also modeled a clay octopus stand just to demonstrate that if a user has the CAD and technical skills to create more complex shapes, they certainly can and add that to the standardized port.